Introduction
RKE2 and K3S are certified Kubernetes distributions from SUSE Rancher. Both distributions support Postgres as a backend datastore.
you can use External DataStore for setting up HA K3S or RKE2.
Architecture
If you are running more than 1 control plane nodes for HA, use external Loadbalancer like Nginx, Haproxy

Setting up Environment
This guide will walk you through setting up K3s with Postgres as an external datastore, using Vagrant and VirtualBox.
Example Vagrantfile
# -*- mode: ruby -*-
# vi: set ft=ruby :

# All Vagrant configuration is done below. The "2" in Vagrant.configure
# configures the configuration version (we support older styles for
# backwards compatibility). Please don't change it unless you know what
# you're doing.
Vagrant.configure("2") do |config|
  # The most common configuration options are documented and commented below.
  # For a complete reference, please see the online documentation at
  # https://docs.vagrantup.com.

  # Every Vagrant development environment requires a box. You can search for
  # boxes at https://vagrantcloud.com/search.
  config.vm.box = "bento/ubuntu-24.04"
  config.vm.box_version = "202502.21.0"

  (1..3).each do |i|
    config.vm.define "master#{i}" do |master|
      master.vm.hostname = "master#{i}"
      master.vm.network "private_network", ip: "192.168.33.#{11 + i}" # Starts with  12
      master.vm.provider "virtualbox" do |vb|
        vb.memory = "8200"   # Assigns 2GB RAM
        vb.cpus = 4         # Assigns 2 CPU cores
      end
      # master.vm.provision "shell",
      #   run: "always",
      #   inline: <<-SHELL
      #   # Add Docker's official GPG key:
      #     sudo apt-get update
      #     sudo apt-get install net-tools
      #     # route add default gw 192.168.33.1

      #   SHELL
    end
  end

  (1..1).each do |i|
    config.vm.define "postgres#{i}" do |postgres|
    postgres.vm.hostname = "postgres#{i}"
    postgres.vm.network "private_network", ip: "192.168.33.#{10 + i}" # Starts with  11
    postgres.vm.provision "shell",
        inline: <<-SHELL
          # Add Docker's official GPG key:
          sudo apt update
          sudo apt install dirmngr ca-certificates software-properties-common apt-transport-https lsb-release curl -y
          curl -fSsL https://www.postgresql.org/media/keys/ACCC4CF8.asc | gpg --dearmor | sudo tee /usr/share/keyrings/postgresql.gpg > /dev/null
          echo deb [arch=amd64,arm64,ppc64el signed-by=/usr/share/keyrings/postgresql.gpg] http://apt.postgresql.org/pub/repos/apt/ $(lsb_release -cs)-pgdg main | sudo tee /etc/apt/sources.list.d/postgresql.list


          sudo apt install postgresql-client-15 postgresql-15 -y


          # Ensure PostgreSQL service is running
          sudo systemctl enable postgresql

          # Configure PostgreSQL: Allow password authentication
          sudo sed -i "s/^#listen_addresses = 'localhost'/listen_addresses = '0.0.0.0'/" /etc/postgresql/15/main/postgresql.conf
          echo "host all all 0.0.0.0/0 md5" | sudo tee -a /etc/postgresql/15/main/pg_hba.conf

          # Restart PostgreSQL service
          sudo systemctl restart postgresql


          # Set up a PostgreSQL user and database
          sudo -u postgres psql -c "CREATE USER vagrant WITH PASSWORD 'vagrant';"
          sudo -u postgres psql -c "ALTER USER vagrant WITH SUPERUSER;"
          sudo -u postgres psql -c "CREATE DATABASE k3s OWNER vagrant;"
          SHELL
    end
  end


end
Note Ensure IP addresses do not conflict with existing configurations.
this Vagrantfile has 3 master nodes and 1 node for Postgres.
all the nodes are using Private Network
| IP | Hostname |
|---|---|
| 192.168.33.11 | postgres1 |
| 192.168.33.12 | master1 |
| 192.168.33.13 | master2 |
| 192.168.33.14 | master3 |
Username: vagrant Password: vagrant DB name: k3s
To start the servers run
vagrant up
you can check the status of all the instances
vagrant status
Current machine states:

master1                   running (virtualbox)
master2                   running (virtualbox)
master3                   running (virtualbox)
postgres1                 running (virtualbox)

This environment represents multiple VMs. The VMs are all listed
above with their current state. For more information about a specific
VM, run `vagrant status NAME`.
K3S with Postgres as Backend
Login to the first master
vagrant ssh master1
run the below command. theese are the resouces that we are disabling
- flannel
- servicelb
- network-policy
- kube-proxy
- cloud-controller(Disabling these as we we are running locally)
Refer to the Arguments that can be passed to server Link
- We will replace
flanneland kube-proxy withcilium servicelbwill be replaced with MetalLB
--datastore-endpoint specifies the Postgres connection string, --disable flags disable unnecessary components.
curl -sfL https://get.k3s.io | sh -s - server\
    --datastore-endpoint "postgres://vagrant:vagrant@192.168.33.11:5432/k3s" \
    --flannel-backend none \
    --disable-network-policy \
    --disable-cloud-controller \
    --disable-kube-proxy \
    --disable servicelb \
    --token aby4z1v29iscc
[INFO]  Finding release for channel stable
[INFO]  Using v1.32.3+k3s1 as release
[INFO]  Downloading hash https://github.com/k3s-io/k3s/releases/download/v1.32.3+k3s1/sha256sum-arm64.txt
[INFO]  Downloading binary https://github.com/k3s-io/k3s/releases/download/v1.32.3+k3s1/k3s-arm64
[INFO]  Verifying binary download
[INFO]  Installing k3s to /usr/local/bin/k3s
[INFO]  Skipping installation of SELinux RPM
[INFO]  Creating /usr/local/bin/kubectl symlink to k3s
[INFO]  Creating /usr/local/bin/crictl symlink to k3s
[INFO]  Creating /usr/local/bin/ctr symlink to k3s
[INFO]  Creating killall script /usr/local/bin/k3s-killall.sh
[INFO]  Creating uninstall script /usr/local/bin/k3s-uninstall.sh
[INFO]  env: Creating environment file /etc/systemd/system/k3s.service.env
[INFO]  systemd: Creating service file /etc/systemd/system/k3s.service
[INFO]  systemd: Enabling k3s unit
Created symlink /etc/systemd/system/multi-user.target.wants/k3s.service → /etc/systemd/system/k3s.service.
[INFO]  systemd: Starting k3s
Check the status of cluster
kubectl get nodes
NAME      STATUS     ROLES                  AGE   VERSION
master1   NotReady   control-plane,master   37s   v1.32.3+k3s1


kubectl get pods -A
NAMESPACE     NAME                                      READY   STATUS    RESTARTS   AGE
kube-system   coredns-ff8999cc5-zlwxr                   0/1     Pending   0          39s
kube-system   helm-install-traefik-crd-v2xck            0/1     Pending   0          40s
kube-system   helm-install-traefik-jbxbw                0/1     Pending   0          40s
kube-system   local-path-provisioner-774c6665dc-9nvpd   0/1     Pending   0          39s
kube-system   metrics-server-6f4c6675d5-wf4dr           0/1     Pending   0          39s
Install helm
Replace flannel with cilium
flannel and kube-proxy is replaced by cilium
Deploy cilium
export KUBECONFIG=/etc/rancher/k3s/k3s.yaml
Adding Helm repos
helm repo add cilium https://helm.cilium.io/

helm repo update
To know the k8sServiceHost
kubectl config view --minify -o jsonpath='{.clusters[0].cluster.server}'
https://127.0.0.1:6443
helm install cilium cilium/cilium \
   --namespace kube-system \
   --set operator.replicas=1 \
   --set kubeProxyReplacement=true \
   --set k8sServiceHost=127.0.0.1 \
   --set k8sServicePort=6443 \
   --set bpf.masquerade=true

NAME: cilium
LAST DEPLOYED: Thu Apr  3 16:41:46 2025
NAMESPACE: kube-system
STATUS: deployed
REVISION: 1
TEST SUITE: None
NOTES:
You have successfully installed Cilium with Hubble.

Your release version is 1.17.2.

For any further help, visit https://docs.cilium.io/en/v1.17/gettinghelp
Check the status of cilium deployment
kubectl get pods -n kube-system -l app.kubernetes.io/part-of=cilium
NAME                              READY   STATUS    RESTARTS   AGE
cilium-2sflx                      1/1     Running   0          74s
cilium-envoy-qwh25                1/1     Running   0          73s
cilium-operator-ffd679986-hzskl   1/1     Running   0          75s
once the cilium is up and running other pods will be in Running State and node will be in ready state
kubectl get nodes
NAME      STATUS   ROLES                  AGE   VERSION
master1   Ready    control-plane,master   26m   v1.32.3+k3s1
kubectl get pods -A
NAMESPACE     NAME                                      READY   STATUS      RESTARTS   AGE
kube-system   cilium-2sflx                              1/1     Running     0          2m36s
kube-system   cilium-envoy-qwh25                        1/1     Running     0          2m35s
kube-system   cilium-operator-ffd679986-hzskl           1/1     Running     0          2m37s
kube-system   coredns-ff8999cc5-zlwxr                   1/1     Running     0          18m
kube-system   helm-install-traefik-crd-v2xck            0/1     Completed   0          18m
kube-system   helm-install-traefik-jbxbw                0/1     Completed   2          18m
kube-system   local-path-provisioner-774c6665dc-9nvpd   1/1     Running     0          18m
kube-system   metrics-server-6f4c6675d5-wf4dr           1/1     Running     0          18m
kube-system   traefik-67bfb46dcb-786q5                  1/1     Running     0          94s
Deploy MetalLB
helm repo add metallb https://metallb.github.io/metallb
helm install metallb metallb/metallb
"metallb" has been added to your repositories
NAME: metallb
LAST DEPLOYED: Thu Apr  3 16:56:45 2025
NAMESPACE: default
STATUS: deployed
REVISION: 1
TEST SUITE: None
NOTES:
MetalLB is now running in the cluster.

Now you can configure it via its CRs. Please refer to the metallb official docs
on how to use the CRs.
Wait all metallb pods are in running state
kubectl get pods
NAME                                  READY   STATUS    RESTARTS   AGE
metallb-controller-8474b54bc4-t4jjh   1/1     Running   0          99s
metallb-speaker-tz6xf                 4/4     Running   0          99s
Configure metallb
Once metalb pods are running state configure IPAddressPools for Metallb
cat <<-EOF | kubectl apply -f -
apiVersion: metallb.io/v1beta1
kind: IPAddressPool
metadata:
  name: ip-pool
  namespace: default
spec:
  addresses:
  - 192.168.33.192/27
EOF

ipaddresspool.metallb.io/ip-pool created
Configuration for L2Advertisement
cat <<-EOF | kubectl apply -f -
apiVersion: metallb.io/v1beta1
kind: L2Advertisement
metadata:
  name: ip-pool-l2-adv
  namespace: default
spec:
  ipAddressPools:
  - ip-pool
EOF

l2advertisement.metallb.io/ip-pool-l2-adv created
kubectl get IPAddressPool,L2Advertisement
NAME                               AUTO ASSIGN   AVOID BUGGY IPS   ADDRESSES
ipaddresspool.metallb.io/ip-pool   true          false             ["192.168.33.192/27"]

NAME                                        IPADDRESSPOOLS   IPADDRESSPOOL SELECTORS   INTERFACES
l2advertisement.metallb.io/ip-pool-l2-adv   ["ip-pool"]
Once these configurations are successfully applied, you can check the traefik service is getting ip address from metalb
kubectl get svc -n kube-system
NAME             TYPE           CLUSTER-IP      EXTERNAL-IP      PORT(S)                      AGE
cilium-envoy     ClusterIP      None            <none>           9964/TCP                     18m
hubble-peer      ClusterIP      10.43.151.224   <none>           443/TCP                      18m
kube-dns         ClusterIP      10.43.0.10      <none>           53/UDP,53/TCP,9153/TCP       23m
metrics-server   ClusterIP      10.43.213.85    <none>           443/TCP                      23m
traefik          LoadBalancer   10.43.212.165   192.168.33.192   80:30133/TCP,443:31023/TCP   6m44s
Attach additional Master nodes to the cluster
Once the primary node is successfully provisioned, you can attach master2 and master3 nodes.
SSH into master2
vagrant ssh master2
curl -sfL https://get.k3s.io | sh -s - server\
    --datastore-endpoint "postgres://vagrant:vagrant@192.168.33.11:5432/k3s" \
    --server https://192.168.33.12:6443 \
    --flannel-backend none \
    --disable-network-policy \
    --disable-cloud-controller \
    --disable-kube-proxy \
    --disable servicelb \
    --token aby4z1v29iscc
Make sure --token value is matching with the token that has been used while setting up primary node and --server is Server to connect to, used to join a cluster, keep remaining options same as primary node.
Once installed you can able to see master2 node, wait till the node is in ready state
kubectl get nodes
NAME      STATUS     ROLES                  AGE   VERSION
master1   Ready      control-plane,master   30m   v1.32.3+k3s1
master2   NotReady   control-plane,master   1s    v1.32.3+k3s1
kubectl get nodes
NAME      STATUS   ROLES                  AGE   VERSION
master1   Ready    control-plane,master   31m   v1.32.3+k3s1
master2   Ready    control-plane,master   63s   v1.32.3+k3s1
repeat the above steps for master3
Cluster Validation
Checking node statuses, verifying pods are running, and testing external access.
kubectl get nodes
NAME      STATUS   ROLES                  AGE     VERSION
master1   Ready    control-plane,master   34m     v1.32.3+k3s1
master2   Ready    control-plane,master   3m49s   v1.32.3+k3s1
master3   Ready    control-plane,master   63s     v1.32.3+k3s1
Check all the pods are in running state
kubectl get pods -A
NAMESPACE     NAME                                      READY   STATUS      RESTARTS   AGE
default       metallb-controller-8474b54bc4-t4jjh       1/1     Running     0          14m
default       metallb-speaker-tz6xf                     4/4     Running     0          14m
default       metallb-speaker-wwxq4                     4/4     Running     0          3m21s
default       metallb-speaker-zx6wl                     2/4     Running     0          37s
kube-system   cilium-2sflx                              1/1     Running     0          18m
kube-system   cilium-59fwn                              1/1     Running     0          102s
kube-system   cilium-6ds5v                              1/1     Running     0          4m29s
kube-system   cilium-envoy-cp6zc                        1/1     Running     0          4m29s
kube-system   cilium-envoy-pj5bk                        1/1     Running     0          102s
kube-system   cilium-envoy-qwh25                        1/1     Running     0          18m
kube-system   cilium-operator-ffd679986-hzskl           1/1     Running     0          18m
kube-system   coredns-ff8999cc5-7v265                   1/1     Running     0          36s
kube-system   helm-install-traefik-crd-v2xck            0/1     Completed   0          34m
kube-system   helm-install-traefik-jbxbw                0/1     Completed   2          34m
kube-system   local-path-provisioner-774c6665dc-9nvpd   1/1     Running     0          34m
kube-system   metrics-server-6f4c6675d5-wf4dr           1/1     Running     0          34m
kube-system   traefik-67bfb46dcb-786q5                  1/1     Running     0          17m
from your host you should be able to reach Ingress IP address, here IP address is 192.168.33.192
kubectl get svc -n kube-system
NAME             TYPE           CLUSTER-IP      EXTERNAL-IP      PORT(S)                      AGE
cilium-envoy     ClusterIP      None            <none>           9964/TCP                     30m
hubble-peer      ClusterIP      10.43.151.224   <none>           443/TCP                      30m
kube-dns         ClusterIP      10.43.0.10      <none>           53/UDP,53/TCP,9153/TCP       36m
metrics-server   ClusterIP      10.43.213.85    <none>           443/TCP                      36m
traefik          LoadBalancer   10.43.212.165   i   80:30133/TCP,443:31023/TCP   19m
Validation and Testing
Deploy Nginx to validate configurations by Accessing via Service and via Ingress
kubectl apply -f - <<EOF
apiVersion: v1
kind: Service
metadata:
  name: nginx
spec:
  type: LoadBalancer
  externalTrafficPolicy: Local
  ports:
    - port: 80
  selector:
    app: nginx
---
apiVersion: apps/v1
kind: Deployment
metadata:
  name: nginx
spec:
  replicas: 1
  selector:
    matchLabels:
      app: nginx
  template:
    metadata:
      labels:
        app: nginx
    spec:
      containers:
        - name: nginx
          image: nginx
          ports:
            - containerPort: 80
EOF

service/nginx unchanged
deployment.apps/nginx unchanged
check the service is getting IP address from metallb
kubectl get svc,po
NAME                              TYPE           CLUSTER-IP      EXTERNAL-IP      PORT(S)        AGE
service/kubernetes                ClusterIP      10.43.0.1       <none>           443/TCP        90m
service/metallb-webhook-service   ClusterIP      10.43.244.196   <none>           443/TCP        70m
service/nginx                     LoadBalancer   10.43.251.169   192.168.33.193   80:31861/TCP   119s

NAME                                      READY   STATUS    RESTARTS   AGE
pod/metallb-controller-8474b54bc4-t4jjh   1/1     Running   0          70m
pod/metallb-speaker-tz6xf                 4/4     Running   0          70m
pod/metallb-speaker-wwxq4                 4/4     Running   0          58m
pod/metallb-speaker-zx6wl                 4/4     Running   0          56m
pod/nginx-86c57bc6b8-hqpph                1/1     Running   0          119s
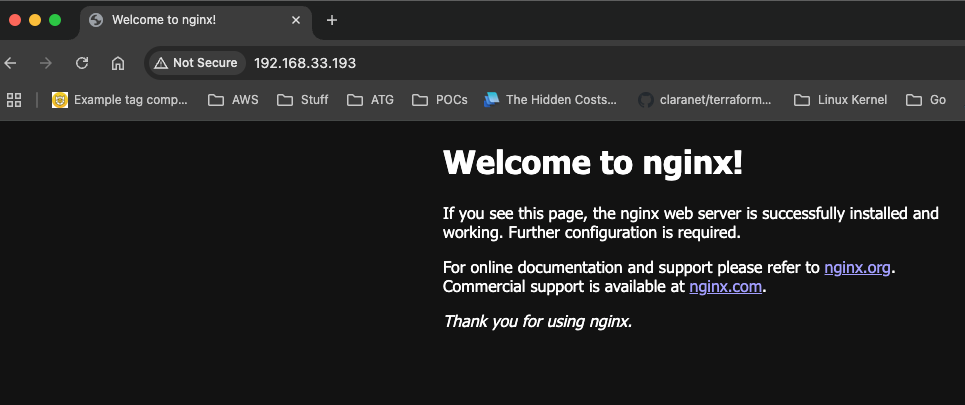
you can access your nginx via 192.168.33.193
Troubleshooting
- Postgres connection errors (e.g., incorrect credentials or IP restrictions).
- Nodes stuck in NotReady state (e.g., insufficient resources or network issues).
- MetalLB not assigning external IPs (e.g., IP range conflicts).
Conclusion
Setting up K3s with Postgres as an external datastore provides a robust and scalable solution for high availability in Kubernetes clusters. By leveraging tools like Vagrant, VirtualBox, Cilium, and MetalLB, you can create a production-ready environment that supports advanced networking and load balancing.
In this guide, we covered:
- Configuring a multi-master K3s cluster with Postgres as the backend datastore.
- Replacing default components like Flannel and kube-proxy with Cilium for enhanced networking.
- Using MetalLB to enable LoadBalancer functionality for bare-metal clusters.
- Validating the setup by deploying and accessing an Nginx service.
- This setup ensures that your cluster is resilient, efficient, and ready for edge computing or IoT workloads. If you encounter any issues, refer to the troubleshooting section for common problems and their solutions.
Feel free to experiment with additional configurations, such as integrating other CNIs or external load balancers, to further optimize your cluster. For more advanced use cases, explore the official K3s documentation.
Happy Kubernetes-ing!🚀